Showing posts with label Recipe. Show all posts

16 January 2011

Crispy Roast Pork

It's been a long long time since the last post. I'm still astonished with the rapid passing of the last one year. Nevertheless I'm glad that God has been so gracious to me in 2010 and believe the He has crowned me with goodness and abundance in 2011.

We had a wonderful dinner at my sis-in-law's place last Christmas and she cooked crispy pork belly. It was well-done and memorable. It is remarkable at how she has improved tremendously on her baking and cooking over the years to feed her beloved family. So blessed!

I have a Roast Pork recipe that I cut from The Straits Times dated 6 June 2010. It looked simple. So here goes the adaptation...


Ingredients

700g pork belly (tell the butcher that it is for roasting)
2 tsp salt
1/5 tsp ground pepper

Method

1. Preheat oven to 230 deg C

2. Score the skin of the pork belly length-wise. The cuts should be about 0.5cm deep and about 1 to 2cm apart.

3. Rub 1/5 tsp of salt and pepper on the underside of pork belly, then turn it over and rub the remaining salt over the skin. Ensure that the salt is rubbed between each slit in the skin.

4. Place the pork belly on a grill rack and roast for 30 minutes or until the skin starts to brown.

5. Reduce the temperature to 180 deg C and roast for another 45 minutes to an hour until the skin is golden brown.

6. Switch to grill mode and raise the temperature to 230 deg C for 7 minutes. Check frequently to ensure that the crackling does not burn.

7. Tap the back of a metal spoon against the crackling; if it produces a hollow sound, the pork belly is done.

Serves four.

06 February 2010

Horlicks Doggie Cookies

I saw Precious Moments' Horlicks Doggie Cookies recipe last year and was attracted to it. So it's a must-do recipe for this year's Chinese New Year. Since I'm meeting my brother's family for reunion lunch today, I decided to made these for them this morning. Hope they like them.


Ingredients

180g butter (she recommended Golden Churn) - softened
80g Horlicks
100g chocolate chips
200g top flour
25g cornflour
25g milk powder
Koko Krunch

Method

1 Sift the flour, cornflour and milk powder.

2. Cream the butter and Horlicks for 3 minutes at low speed. Do not overbeat. (I used hand whisk to beat till just creamy)

3. Add the sifted flour and beat for about one minute to form a dough.

4. Wrap the dough with cling wrap and chill the dough for 15-30 minutes.

5. Divide dough into 10g each. Embed 3 chocolate chips into each piece of dough and roll into a ball.

6. Insert 2 pieces of Koko Krunch to form the ears and 1 chocolate chip as the nose. And two chocolate rice for the eyes.

7. Bake at 140 °C for about 25 minutes.

8. Cool before storing.

01 January 2010

Lemongrass Drink - More Than Just A Drink

It was a bright and sunny morning of a brand new year.

I love the smell of lemongrass and having a packet of lemongrass that we bought from NTUC Finest still lying in the refrigerator, I decided to prepare some lemongrass drinks. It is my first time, so I just estimate.

While enjoying my lemongrass drink, I searched the internet for lemongrass drink recipes and came across the following article (please click on the link to read the article):

Fresh lemon grass fields in Israel become mecca for cancer patients.

I knew lemongrass has medicinal effects and is an insect repellant, but I have never known that it can kill cancer cells. It got me excited and shall be sending that message to friends soon.

Ingredients

12 stalks of lemongrass
3 litres of water
4 TBS honey

Method

1. Cut the lemongrass into about 2 inches long and smash them.

2. Boil the lemongrass with 3 litres of water for about 30 minutes. (I put them inside the thermal pot and simmer for another 1 hour)

3. Strain the lemongrass drink and mix with honey. Enjoy it hot or cold.

The lemongrass drink recipe at Jas' Kitchen added pandan leaves too. I will try that recipe next time.

Additional note:

On the following week, I made another round of lemongrass drink. This time, I added pandan leaves, cut 7 large stalks of lemongrass into halves and pounded them, and then boiled with honey rock sugar (石蜂糖) and about 6 litres of water. It was very good.

23 October 2009

No Knead Focaccia

I've always found bread-making kind of intimidating because of several failed experiences that resulted in hard, weird tasting "bread". Perhaps acquiring a breadmaker, attending bread-making workshops or watching more demo on bread-making on Youtube will help.

It's not that I've made bread that many times though. Nevertheless, I'll continue to look out for easy recipes to try out since I'm still a "newbie to bread-making". Hahaha. It sounds like a nick that my dear friend, IC, used in the flowerpod forum.

I found this interesting bread recipe that does not require any kneading at My Culinary Journal by Peony. Since I have a half packet of bread flour still sitting in the cabinet, I just needed to find some time to try it out. It's really extremely easy to make.

The first time I made, it turned out a bit like "kueh". Perhaps it was just like one of the readers at the blog had described. However, after re-heating a bit for breakfast the next day, the texture improved to become more like bread. As it was a little salty, it went very well with the nonya kaya that my sister-in-law gave us.

It turned out great the second time after baking it for a little while more. Mum found it a bit too salty, but I thought it tasted quite alright. Perhaps it was because I didn't manage to sprinkle the salt evenly.

Well, I'll definitely try it again since it's an easy recipe.


Ingredients

1 cup (250ml) tepid water
1 tsp dry yeast
1 tsp ground sea salt (I used normal salt)
2 cups (~275g) flour (I used bread flour)
extra virgin olive oil
Topping: coarse sea salt, rosemary, olives (your choice)

Method

1. Dissolve the yeast in tepid water.

2. Add yeast and water mixture to a larger bowl with a cup of flour and salt. Stir for 2 minutes. Then add another cup of flour. Stir again for about 3-4 minutes. The dough should not be overworked. The consistency will remain quite soft and sticky.

3. Keep the dough refrigerated until next day for about 12 hours.

4. Remove the dough from fridge about 2 hours before baking.

5. Preheat oven to 230C. Carefully pour dough on an oiled baking tray. Use finger tips to pull the dough into shape. (Dipping finger tips briefly in olive oil will keep the dough from sticking too much to them)

6. Sprinkle 1-2 tbsp of olive oil , coarse sea salt, chopped herbs or other toppings on the dough just before baking.

7. Bake for about 15-20 minutes or until lightly browned on top. Remove from the oven and tray and place on a rack to cool.

21 September 2009

Glutinous Rice (Lo Mai Fun 糯米饭)

It's public holiday today. So made glutinous rice for tea-break and dinner. I'm sure it will end up as breakfast tomorrow too.


Ingredients

1kg glutinous rice
30ml olive oil
100g shallots, thinly sliced
100g dried shrimp, soaked till soft then drained
100g dried mushroom, soaked till soft, drained and thinly sliced
50g dried scallops, soaked till soft then drained
15ml light soya sauce
15ml sesame oil
15ml oyster sauce
15g sugar
salt to taste
pepper to taste
400ml water
100g roasted peanuts
2 stalks scallion, chopped
2 red chilli, chopped

Method

1. Soaked the glutinous rice in water for one hour. Drain and set aside.

2. To a heated wok, add olive oil and fry the shallots until golden brown.

3. Add shrimp, mushroom and scallops and stir-fry for five minutes.

4. Add light soya sauce, sesame oil, oyster sauce, sugar, salt and pepper. Mix well.

5. Add glutinous rice and stir-fry for five minutes.

6. Add water, mix well and cook the rice for two minutes.

7. Transfer the rice into a container and place in a steamer for 30 minutes or until the rice is cooked.

8. Remove the rice from the steamer and top with roasted peanuts, scallions and chilli.

Serves 10. (Note: I made half the portion)

(source: Sunday Times on 15 September 2009 http://www.soshiok.com/articles/14174)

20 August 2009

Chocolate Marble Cake 2

It's mum's birthday today!

It's been a long time since I last baked a cake. The fear of butter and sugar was enough to deter me from doing it more often. I should just say grace over the cake, sanctify it, cast out all the unwanted calories and believe that only the goodness and nutrients enter our bodies as we enjoy it.

I didn't succeed when I attempted All That Matter's Orange Chocolate Marble Cake recipe the last time and ended up with a modified version. Firstly, I did not use evaporated milk. Secondly, I used brown sugar to beat with the egg whites and it did not turn into the soft peak that ATM's recipe requires. Lastly, I did not use the orange zest.

Today, I tried to follow ATM's recipe closely, but without the orange zest.

One mistake I made today was that I forgot to wash the electric hand mixer clean before I beat the egg whites and sugar. After beating for a while, it could not turn into soft peak. Realising the mistake, I had no choice but to discard the mixture (because I really don't know what to do with it), wash the mixer and the mixing bowl, wipe-dry them, take out the measuring scale to measure more sugar, crack more eggs for the egg whites and re-do this step. Thankfully, it worked this time.

This is for mum's birthday...


Mum said that this cake is nice. It's not too oily and thus, not so "scary". She doesn't fancy oily cakes and cakes with too much cream. It tastes really nice when it's slightly warm.

Do check out ATM's blog. Rei has also made reference to the marble cake recipe at Aunty Yochana's Cake Delight. It is a pretty tri-colour marble cake. I may give it a try.

I really admire Rei's skill in making those mahjong tiles. They really look like the real thing. Amazing. See her mahjong tiles here....

27 July 2009

Chwee Kueh 2

Have finally made chwee kueh using another recipe found at Icyelite's Life. This recipe is slightly different from Gina's recipe, which I used earlier. Icyelite has added wheat starch, tapioca flour and a little bit of salt, hence her chwee kueh is not completely bland. I like this better.

Icyelite has included one important suggestion on her post that we have as many chwee kueh moulds as we can if we are making a lot. Her recipe yields about 20-24 chwee kuehs.

Mum and H are happy with the chwee kueh, so this is the recipe that I will use next time. I think there are many ways to cook the preserved chopped radish (cai po). So I'm still in the process of trying out. And yes, I have bought my 12 chwee kueh moulds from Phoon Huat, and they are obviously insufficient. So I used some larger chicken pie moulds too.

Ingredients A

150g Rice Flour
1 tbsp Wheat Starch
1 tbsp Tapioca Flour
1 tsp Salt (I use 1/2 tsp)
280ml Tap Water

Ingredients B

550ml Boiling Water

Ingredients C

200g preserved chopped radish (Cai Po)
Sesame Oil
Pepper
Cooking Oil

Method

1. Grease the moulds with oil first to prevent sticking.

2. Mix Ingredients A evenly first.

3. Once A is even, mix Ingredient B into A well.

4. Once done, pour the mixture into the mould and steam for 10 minutes.

5. Dip cai po into salt water (note: I use sweet cai po).

6. Drip dry and fry the cai po.

7. Add oil, sesame oil to cook first.

8. Add sugar and pepper. Cook cai po until dark brown.

9. Let the chwee kueh cool down, dig it out from the mould and serve with cai po.

09 July 2009

Sakura Chicken Rendang

It's been a long time since I last posted. Well, too much time has been spent on "farming" at Farm Town on Facebook, as well as researching on beauty products with my friend, Amy, who has just completed her beautician course and is going to start providing her home-based beauty services on a part-time basis. All the best to my dear friend.

After going to the new Safra Jurong gym two Sundays ago with H, we dropped by Jurong Point's NTUC Xtra. I bought Prima Taste's Rendang (Asian Dry Curry) paste as I have not tried it before and since it was on sale. We also bought the supposedly healthy antibiotic-free Sakura chicken that is only available at NTUC Fairprice supermarkets. At Chicken Rice Company's website, it mentions that Sakura chicken is a special breed of poultry originally from Japan that's known for its succulent and flavourful meat.

It's really very simple to cook and delicious. It was written on the pack that the recipe serves 5-7 persons. But H, mum and I almost finished everything, with H eating the MOST. So it must be really good.

Ingredients

Prima Taste's Rendang pack (it comes with 1 packet of paste and 1 packet of coconut premix)
1 Sakura chicken (chopped into small pieces)
180ml water (3/4 cup)

Method

1. Heat pot till hot. Add Rendang Paste and stir-fry for 2 mins on high heat.

2. Add chicken and stir-fry for 3 mins.

3. Pour Prima Coconut Premix and 180ml water into a bowl. Stir and mix well. Add mixture into pot and bring to boil on medium high heat. Stir occasionally.

4. Lightly boil on medium heat for another 12-14 mins. Stir occasionally while simmering. (Gravy should be slightly thick and glossy when ready.)

5. Serve with warm rice or bread.

(source: www.primataste.com)

09 May 2009

Orange Chiffon Cake

It's Vesak Day today and Mother's Day tomorrow. Blessed Mother's Day to all the mummies!

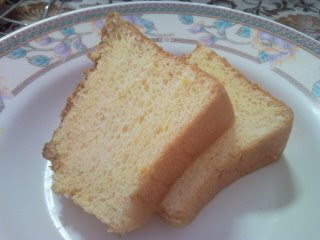
Took the opportunity to try out Florence's orange chiffon cake recipe last night for today's breakfast and snack. It's soft, fluffy, moist and nice. Mum said the sweetness is just nice, not too sweet.


Ingredients

115g cake flour
3/4 tsp baking powder

85ml warm orange juice (I used freshly-squeezed orange juice)
finely grated zest of 1.5 large orange

5 egg yolks + 30g castor sugar + 1/4 tsp salt
5 egg whites + 50g castor sugar + 1/2 tsp cream of tartar

60ml corn oil
1/2 tsp vanilla essence or 2 tsp rum

Method

1. Sieve flour and baking powder

2. Use hand whisk to whisk egg yolk until creamy and light in colour. Add in corn oil, then warm orange juice and vanilla essence (or rum)

3. Add in flour mixture into yolk mixture lightly. Add in orange zest.

4. Beat egg white with electric beater until big bubbles formed. Sprinkle in cream of tartar and beat unitl it is white in colour. Add in 50g sugar 3 times and beat until stiff peak.

5. Pour 1/2 egg white into flour mixture in (3) and blend well.

6. Pour the flour mixture into the rest of egg white and blend well.

7. Bake at 175C for 45 minutes or until cooked.

8. Invert the cooked cake during cooling process.

01 May 2009

Sago Pudding

It's Labour Day today! The packet of sago has been lying in the cabinet for quite a while. Thought of putting some into the green bean soup, but changed my mind. Found this sago pudding recipe at Irene's Favourite Recipes. It's a simple, easy-to-make dessert for a warm Friday afternoon.


Ingredients

200g Sago
Water, enough to cover sago
200g Gula Melaka
150g Water
250ml Coconut Milk

Method

1. Use a medium pot and fill 3/4 of the pot with water. Bring water to boil.

2. Pour sago into boiling water and stir continuously while cooking.

3. Boil with medium for 10 mintues.

4. Turn fire off and place cover over the pot. Let sago 'cook' in the pot for another 10 mintues.

5. Remove the cover and give sago a stir to check all had become transparent.

6. Pour sago over a sieve and rinse under cold water till cooled totally.

7. Scoop sago and place into moulds / bowls. Chill it till ready to be served.

8. Chop gula melaka into pieces. Place in a pot with water and bring mixture to boil till sugar dissolve. Leave to cool.

9. Serve sago pudding with cooled gula melaka syrup and coconut milk.

30 April 2009

Steam Radish Cake II (萝卜糕)

I was on medical leave on Tuesday. Instead of idling at home, I tried out Lily's steam radish cake recipe. It's quite similar to the one that I tried earlier, but she added wheat starch flour and corn flour. I had a 1kg radish, so I just doubled the ingredients, but I used 750ml of water. So the cake was slightly firmer, which makes it easier to pan-fry. The cake was also soft enough to be eaten on its own. Brought some for my care group friends to try and they said it's nice. :-)


Ingredients

500g radish(白萝卜)
2 nos. shallots, sliced
40g dried shrimps
1-2 nos. chinese preserved sausages (腊肠)
4 nos. dried mushrooms
2 tbsp oil, for frying
A little oil for greasing

Batter:
150g rice flour (粘米粉)
15g wheat starch flour (澄面粉)
20g corn starch (太白粉)
500ml water

Seasoning:
1 1/2 tsp salt
1 1/2 tsp sugar
1 tsp sesame oil
pepper, to taste

Method

1. Shred radish. Set aside.

2. Clean and soak both dried shrimps and dried mushrooms until soften. Chop dried shrimps slightly. Cut mushrooms into small cubes.

3. Cut sausages into small cubes.

4. Grease a pan with some oil.

5. Place wheat starch flour, rice flour and corn starch in a mixing bowl. Pour water into flours and stir well.

6. Heat up 2 tbsp of oil in a pan/wok and fry these ingredients by order ,remove and set aside, first the sausages , then the shallots, lastly dried shrimps. Without removing the dried shrimps, add in the mushrooms and then the shredded radish.

7. Season with the seasoning ingredients.

8. Pour the flour mixture into the pan. Cook until the mixture thickens.

9. Place the thick mixture into the greased pan prepared earlier.

10. Steam at high fire for 1 hour.

11. Set aside. Slice when radish cake is cool.

12. Cake can be served as is or pan fried and best eaten with chilly sauce.

17 April 2009

Low-Fat Orange Yogurt Cake

Yesterday was my first time using yogurt to bake cake and it turned out yummy. Try it! The recipe is at Happy Home Baking.


Ingredients

250g cake flour
1 tsp baking powder
1/2 tsp baking soda
1/2 tsp salt
70g butter, soften at room temperature
zest of 1 orange
160g sugar (original recipe calls for 200g of sugar)
2 eggs, lightly beaten
1 cup plain, non-fat yogurt
1 tsp vanilla essence
2 tbsp orange juice

Method

1. Preheat oven at 180 degC. Grease or line a 8" by 4" loaf pan.

2. Sift together cake flour, baking powder, baking soda and salt. Set aside.

3. In a bowl, mix together yogurt, vanilla essence and orange juice.

4. With an electric mixer, beat butter and orange zest for 1 minute.

5. Add in eggs gradually, about 1 tablespoon at a time, beat constantly for about 2 minutes.

6. On low speed, beat in 1/3 of the flour mixture.

7. On medium-high speed, beat in 1/2 of the yogurt mixture.

8. On low speed, beat in half of the remaining flour mixture.

9. On high speed, beat in the remaining yogurt mixture.

10. On low speed, beat in the rest of the flour mixture.

11. Scrape into the prepared pan and bake for 45 minutes or until a toothpick inserted into the centre comes out clean.

I made half the portion of the recipe and baked for about 25-30 minutes. Yielded 3 large cupcakes for mum and I.

10 April 2009

Ban Chien Kueh(面煎糕)

It's one of the traditional and vanishing snacks that we have enjoyed since young. I'm thankful that the recipe is available at Kitchen Capers' forum. Do have a try if you like it.


Ingredients

Batter
330g plain flour (alternative: 230g plain flour and 100g rice flour)
3 eggs
70g caster sugar (already reduced)
1 tsp instant dry yeast
1 tsp baking soda
420ml water

Peanut Filling
300g toasted peanuts, finely grounded/chopped/blended
caster sugar/brown sugar for sprinkling
butter
(optional) can of sweet corn

Method

1. Mix all batter ingredients in a bowl and stir until well combined. Let mixture rest for at least 30 minutes.

2. Heat up a non-stick pan and rub with a little oil. Pour in enough batter (one ladle or more) to make the skin as thick as you like. Cook at medium low heat for about 1 minute or until cooked/nicely browned.

3. Sprinkle filling on top and fold it into half (half moon shape). Remove from pan and serve!

05 April 2009

Chwee Kueh

We forgot to buy breakfast for tomorrow and not wanting to make a trip to buy bread and not wanting to eat instant noodle, I decided to try on Gina(KC)'s Chwee Kueh recipe that I saw at her website and also at Cuisine-Asia as I still have some preserved chopped radish left from yesterday's "experiment".

Ingredients

200g rice flour
1,000ml boiling water

200g preserved chopped radish (chai por), washed and drained
1 clove of garlic, chopped
2 tbsp light soy sauce
3 tbsp sugar
50ml corn oil

Method

1. Heat up a claypot with corn oil and saute the chopped garlic till fragrant. Add preserved chopped radish, light soy sauce and sugar and stir fry for 2 minutes.

2. Cover the claypot and lower the heat to let it simmer for 5 minutes. Turn off the heat.

3. Sift rice flour in a mixing bowl and slowly pour boiling water and stir till there are no lumps in the batter.

4. Pour batter into aluminium cups and steam over high heat for 5 minutes.

5. Remove the chwee kueh from the cup and garnish with a spoonful of cooked radish.

I did half of the recipe and yielded 12 chwee kuehs because I only have 100g of chai por left. I have also left out the sugar because I find that the chai por I bought is kind of sweet. The chwee kuehs were steamed in teacups instead of the aluminium cups as I do not have them.

H said they are almost as good as the ones bought outside. Perhaps it's time to invest in some aluminium cups?

Huat Kueh (发糕)

发糕 is one of the recipes that I wanted to try out. Mum used to make it long time ago and I'm missing the homemade one.

Mum said that grandmother used to cook the brown sugar / gula melaka syrup first and then mix the flour together with the syrup after the sugar syrup has cooled.

Most of the other recipes I saw at Random Rumblings, FenYing's recipe and All That Matters require coconut milk, which is not mum's preference. I will try their recipes some other time to see how they taste like.


Ingredients

250g Self-Raising Flour
100g coconut sugar / brown sugar
200ml hot water

Method

1. Melt the sugar with hot water and let it cool.

2. Mix the self-raising flour and the sugar syrup together.

3. Pour batter into a bowl and sprinkle sugar across the mixture into a + sign and steam with high heat for 45-50 minutes.

04 April 2009

Wah Kueh - Chinese Rice Bowl Pudding(碗糕)

Another "off" day for me to try out new recipe. :-)

I'm trying out this traditional Hokkien rice bowl pudding recipe that I saw at Cuisine-Asia, an interesting site with a great collection of recipes. It's Gina(KC)'s recipe.


Ingredients

300g rice flour
50g wheat starch (澄面粉)
1/2 tsp salt
1/2 tsp pepper
1.5 litres hot water

6 tbsp chopped preserved radish (chai poh 萝卜干)
5 dried mushrooms, soaked and thinly sliced
1 tbsp dried shrimps
100g Chinese sausage, chopped

Method

1. In a large mixing bowl, place rice flour, wheat starch, salt and pepper together. Pour in hot water and mix until well-blended and smooth.

2. Pour pudding mixture into small bowls, about three-quarter full.

3. Steam pudding over high heat for 25 minutes

4. In the meantime, fry preserved radish, mushrooms, dried shrimps and chopped Chinese sausages together until fragrant. Toss to mix.

5. Place spoonfuls of topping on top of the steamed rice puddings. Return to steam for another 5 minutes.

6. Serve with garnish of fried shallots, chopped spring onions and freshly cut chilli.

I halved the above recipe and yielded about 5 rice bowls of pudding.

Mum says that there is a Hakka version called "Mi Gao Ban", in which alkaline water is added. It is usually eaten with chopped preserved radish (chai poh) and a choice of sweet sauce or soya sauce.

29 March 2009

Maple Chicken And Ribs

Bought some chicken drumsticks and ribs from Carrefour today for tonight's dinner. So I took the opportunity to try out Nigella's recipe. Here's my version because I do not have apple juice at home and I only marinated for about 2.5 hours.


Ingredients

4 pork spare ribs
3 chicken thighs, skin and bone still on
50ml mixed fruit juice (The original recipe requires apple juice)
1 tablespoon maple syrup
0.5 tablespoon vegetable oil
0.5 tablespoon soy sauce
1 star anise
0.5 cinnamon stick, halved
3 cloves garlic, unpeeled


Method

1. Mix all the ingredients together and leave to marinate in the fridge, preferably overnight.


2. Preheat the oven to 200°.

3. Pour the ingredients into a baking tray (making sure the chicken is skin-side up), place in the oven and cook for about an hour and a quarter, by which time everything should be sticky and glossed conker-brown.

24 March 2009

Steam Sponge Cake(鸡蛋糕)

I'm determined to try making 鸡蛋糕 again after a not-so-successful attempt last Wednesday. I think I didn't beat the egg mixture long enough so the cake was rather flat and dry, though the taste was pretty good.

My second try today yields better texture and fragrance.


I'm following closely to the recipe on Baking On Cloud 9. More reference from Cookbake Legacy, Random Ramblings and Fenying's Blog. I'll definitely try the other recipes later.

Ingredients

200g self-raising flour
200g sugar
4 eggs

Method

1. Beat eggs and sugar together till light pale and ribbon stage

2. Gradually fold in the flour till mix well.

3. Pour the mixture into a baking pan and sprinkle sugar across the mixture into a + sign.

4. Steam on high heat for 25 minutes or until skewer comes out clean.

08 March 2009

Sweet and Simple Bakes: Oatmeal and Chocolate Chip Cookies

Here are the cookies baked on this hot and windy Sunday afternoon. It's Sweet and Simple Bakes' 10th monthly baking challenge, but it's my 1st...


The surface of my cookies are not as smooth as those made by Ms Maria and Rosie from Sweet and Simple Bakes. Agree that it's an easy recipe.

Ingredients

110g (4oz) butter, softened
110g (4oz) caster sugar
110g (4oz) soft brown sugar
1 egg
2 tbsp water
1 tsp vanilla extract
250g (9oz) porridge oats (rolled oats)
110g (4oz) self-raising flour
1 level tsp salt
110g (4oz) chocolate chips, raisins or chopped nuts (I used chocolate chips and raisins)

Method

1. Preheat the oven to 180C

2. Cream the butter in a large bowl or in an electric food mixer until soft.

3. Add the sugars and beat until the mixture is light and fluffy.

4. Add the egg, water and vanilla extract while still beating.

5. Reduce the speed and gently mix in the oats, flour, salt and raisins to form a dough.

6. Using your hands, roll the dough into walnut sized balls and place slightly apart on two baking trays.

7. Bake in the oven for 12-25 minutes or until light golden brown but still slightly soft in the centre.

8. Allow to cool on the trays for a minute before transferring to a wire rack to cool.

28 February 2009

Chocolate Marble Cake

Mum bought a $2.15 "marble cake" last weekend. How could it be so cheap? The ingredients were flour, eggs, oil and many other flavourings and colourings. And the marble look was on the surface of the cake only. Sigh, told mum that she should have just let me know that she wanted to eat some cakes and I would have gladly make some for her. But she seems to enjoy eating that $2.15 cake because it was so cheap...

The homemade one, though costs slightly more, is definitely healthier than the one that uses a lot of flavourings and colourings.

I came across a marble cake recipe at All That Matters and adjusted it to use whatever ingredients I have in my cabinet, ie top flour and brown sugar.

It's a learning experience for me. I realised that I could not whisk the egg white and brown sugar to a soft peak as required by the original recipe.

So here is my recipe:


Ingredients

200g butter
160g brown sugar
1 tsp vanilla essence
3 eggs
2 tbsp of low fat milk
200g top flour
1 tsp baking powder

1 tbsp cocoa powder
2 tbsp low fat milk
(mix thoroughly)

Method

1. Beat butter, sugar, vanilla essence until light and creamy

2. Add in one egg at a time and beat until creamy. Add in milk.

3. Fold in flour and baking powder

4. Spoon half of the mixture into a separate bowl. Add in cocoa mixture and stir well.

5. Drop alternate spoonfuls of mixtures into a pan. Use a chopstick to pull backwards and forward through the mixture.

6. Bake cake for 40 minutes in oven of 170 degree Celsius or when the skewer comes out clean. Turn the cake onto the wire rack to cool.